The goal is to add a working AMS to a Klipper printer that already works. First prove the printer works without the AMS, then add the Cortex Bridge and one AMS. Nothing on the AMS is opened or flashed: it keeps its Bambu Lab firmware.
¶ What you need
From the Cortex Bridge kit
- The Cortex Bridge board (the 0AMS bridge), revision A4. The revision is printed on the underside.
- The stronger buffer spring. It replaces the spring in the Bambu Lab buffer; see Fit the stronger buffer spring.
From Bambu Lab
- One AMS1, AMS 2 Pro or AMS HT, still on its Bambu Lab firmware. Up to four can be daisy-chained later; start with one.
- The original Bambu Lab AMS filament buffer with its 4-pin buffer cable, which runs from the bridge's BUFFER connector to the buffer. Both come with the AMS1; for an AMS 2 Pro, Bambu Lab sells the filament buffer with its cable as an addition.
- Optional: a BIQU AMS Lite cable extension, 4-pin, 1 m (BIQU, Amazon), if Bambu Lab's short 4-pin cable does not reach. It plugs in between that cable and the bridge, so the bridge can sit further from the buffer, for example on its DIN clip under the printer, with a single 4-pin run. A 0.5 m version is also sold.
- The stock 6-pin cable from the AMS to the buffer.
For the printer
- A Klipper printer that already prints, with Moonraker and Mainsail, and SSH access to its computer (a Raspberry Pi or a similar Linux computer).
- A USB data cable from the bridge's USB-C port to the Klipper computer (USB-A to USB-C for a Raspberry Pi). A charge-only cable powers the bridge, but the computer never sees it.
- Two wires for 24 V, from spare +24 V and 0 V terminals on the printer's own 24 V power supply to the bridge, rated for at least 5 A (0.75 mm², 18 AWG, or thicker). The supply needs spare capacity for the AMS units, which draw the most while drying. A separate 24 V supply also works.
- A filament cutter at the toolhead. OpenAMS cuts the filament before every swap; tip forming is not supported.
- PTFE tube, 3 mm ID / 4 mm OD, for the filament path. See Prepare the filament path.
- The printed case, the printed PTFE tube coupler v5 with two ECAS04 push-fit collets, and with more than one AMS a printed PTFE splitter. Print and mount the case lists the files, the screws and the tape.
¶ Protect your working setup
- Print something small and check the printer works without the AMS. Any problem you have now will still be there with the AMS attached.
- In Mainsail, open Machine and download a backup of your configuration folder. You can restore it if anything goes wrong.
- Update Klipper and Moonraker from Mainsail's Machine → Update Manager.
¶ Fit the stronger buffer spring
Fit it before you use the AMS. Every Cortex Bridge comes with a stronger replacement spring for the original Bambu Lab filament buffer.
Open the buffer the way Bambu Lab's buffer slider and spring steps show, swap the original, weaker spring for the supplied one, and close the buffer again. Then check that the slider moves freely and springs back.
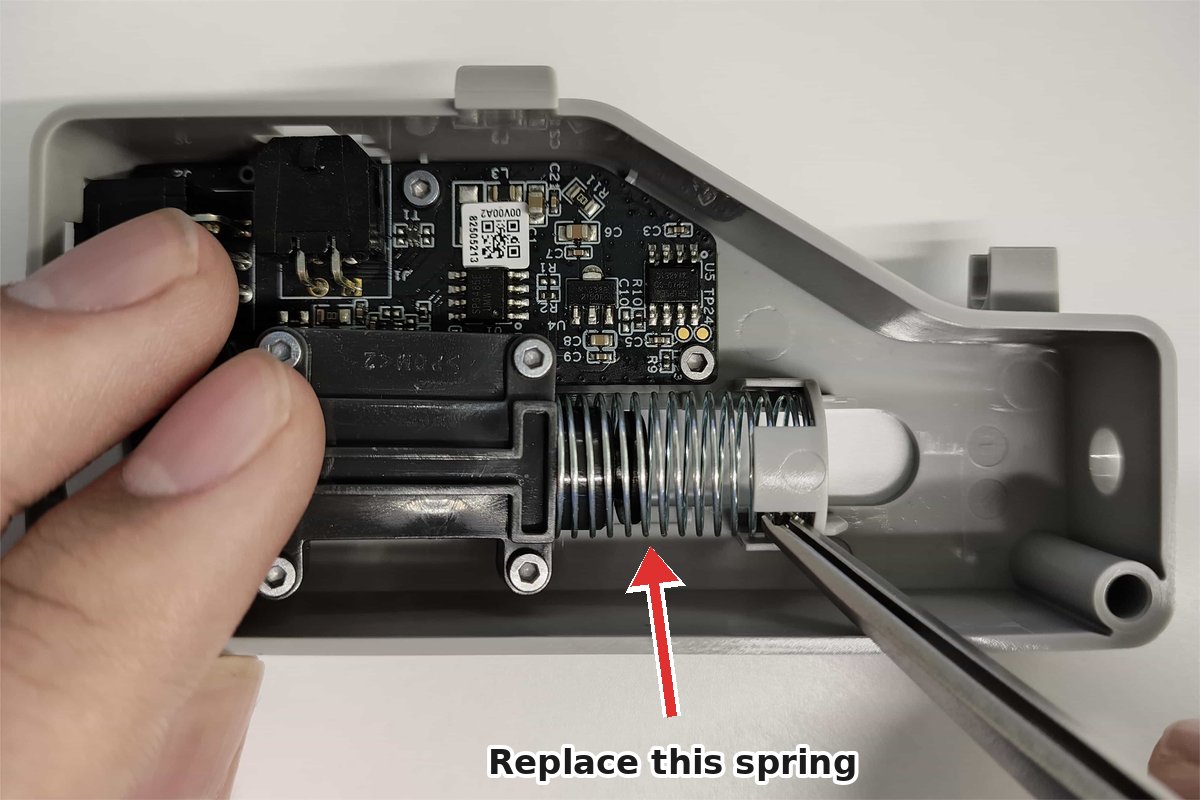
Photo: Bambu Lab Wiki, arrow added.
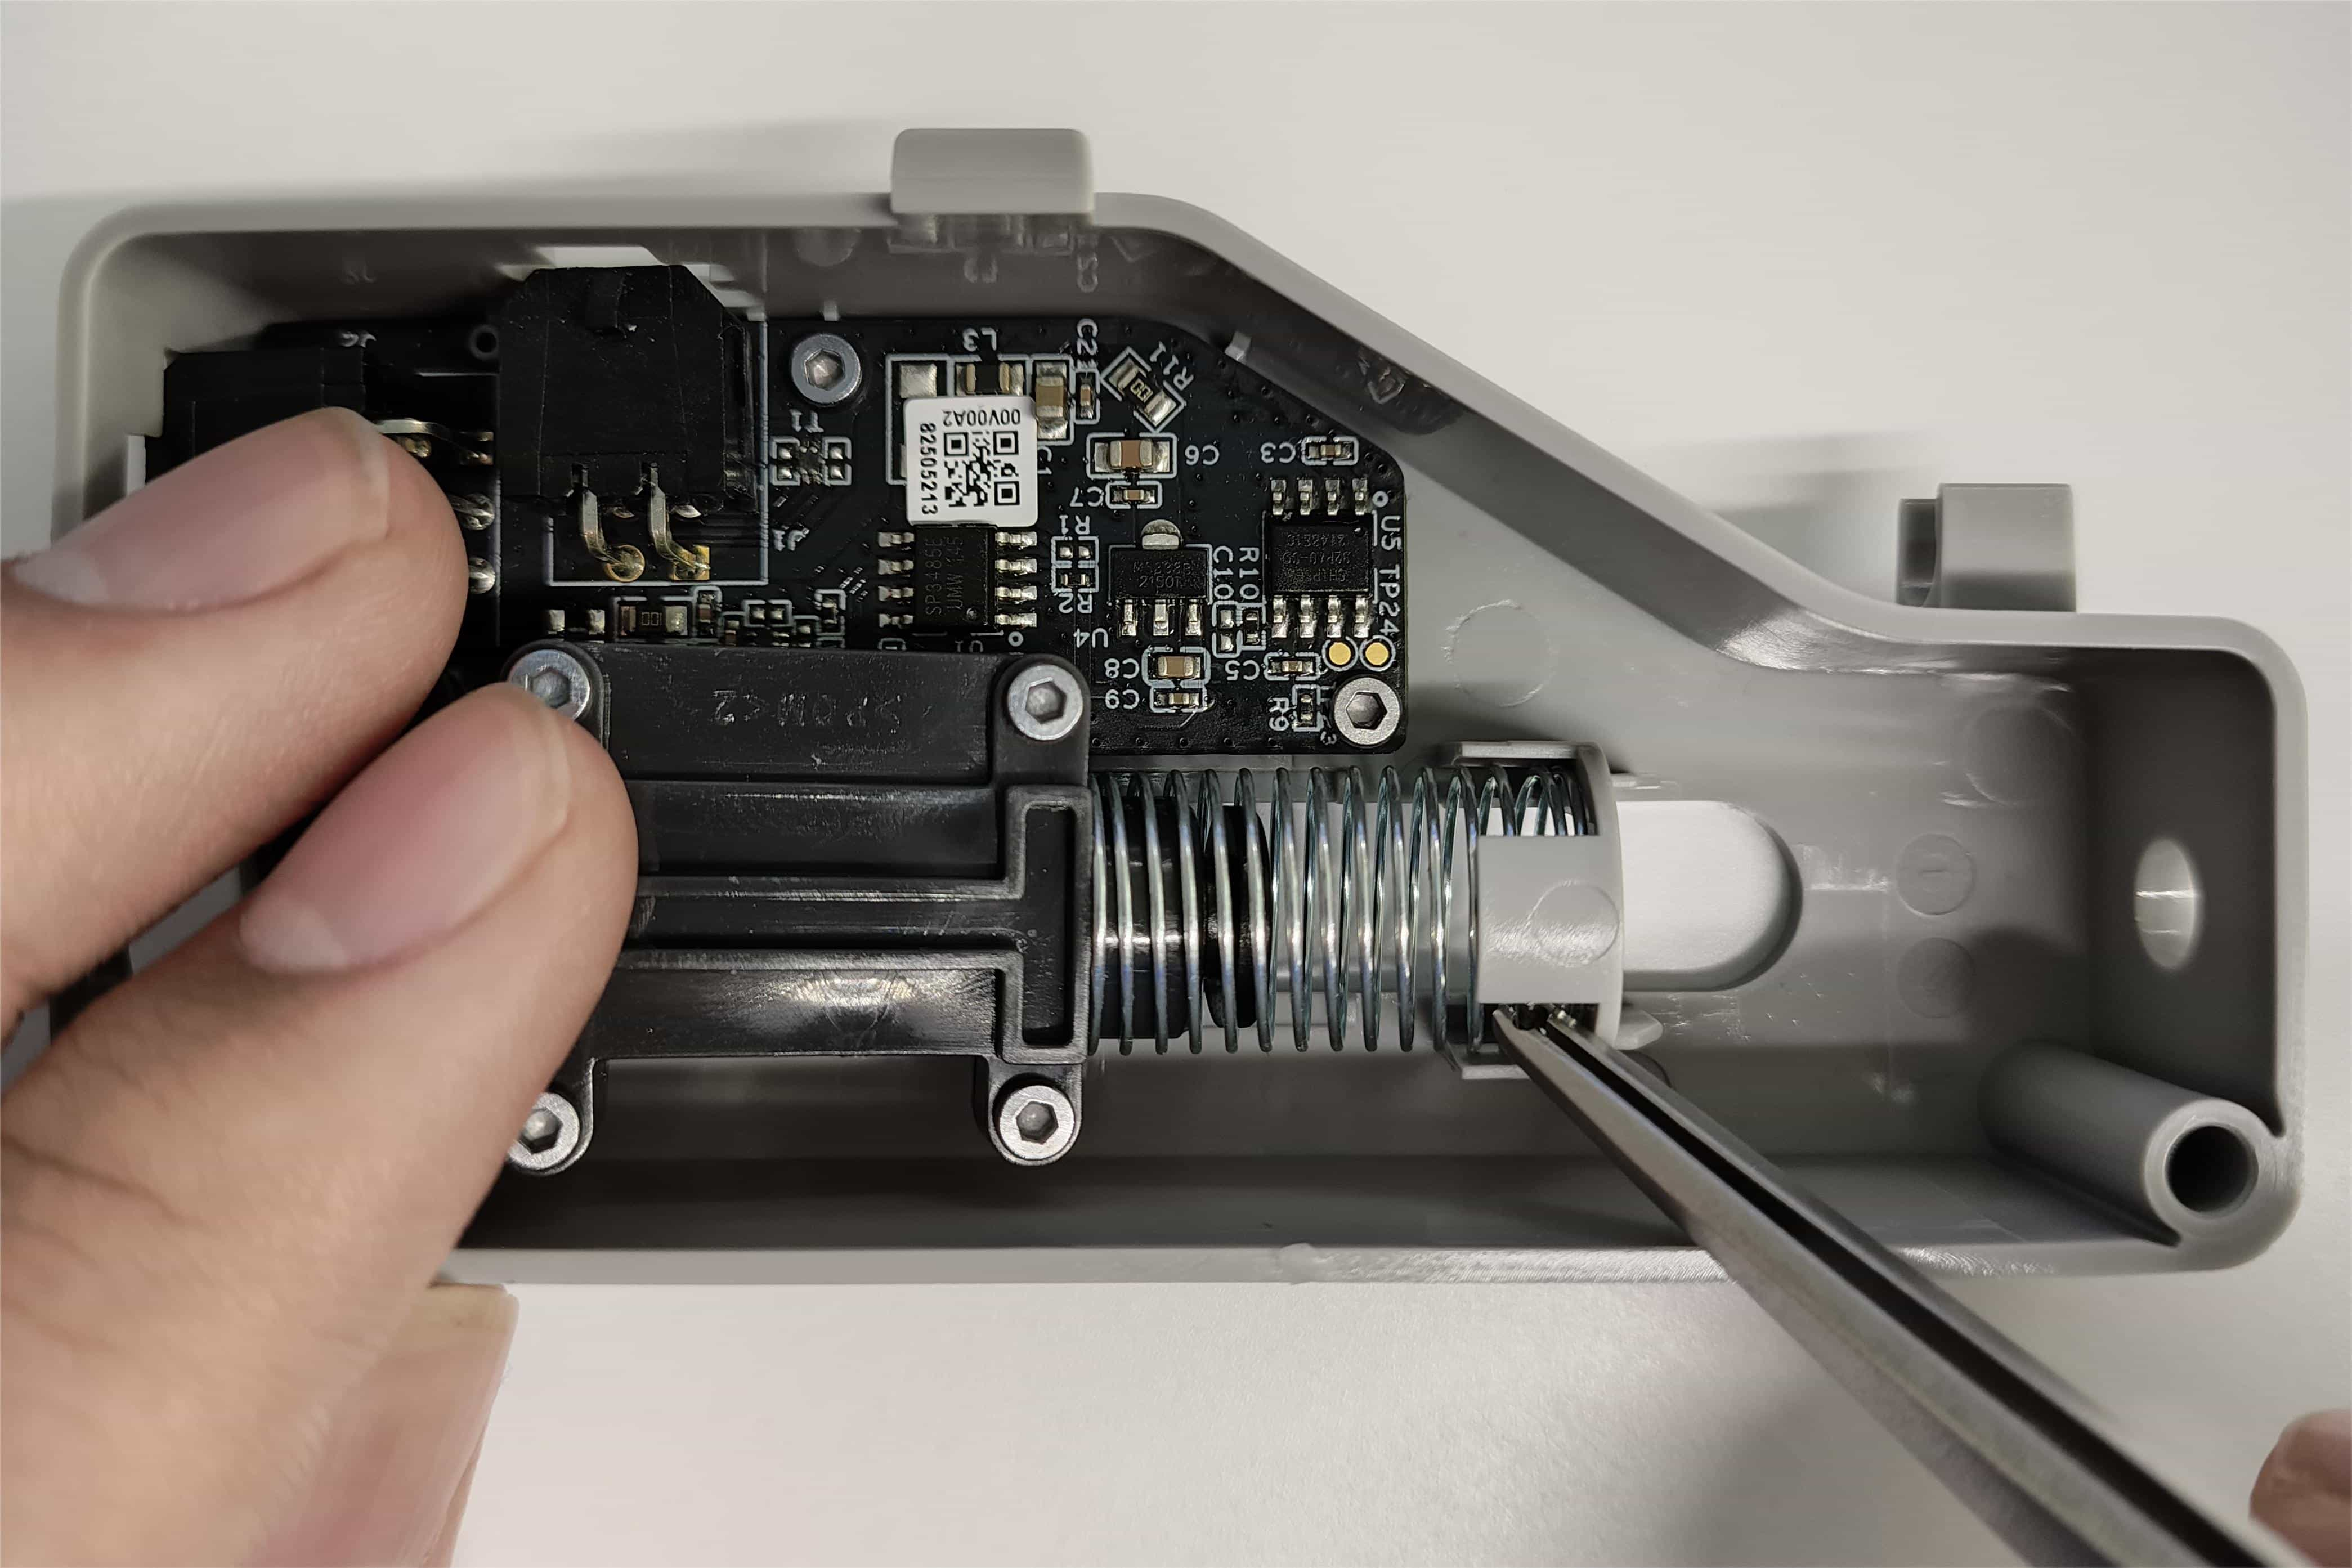
Why: the stronger spring lets the buffer push back against the longer PTFE tube of a Klipper printer without reporting the filament as arrived too early.
¶ Prepare the filament path
PTFE tube: 3 mm ID / 4 mm OD only. Use tube that is 3 mm inside and 4 mm outside from the AMS to the splitter, from the splitter to the buffer, and from the buffer to the coupler. Narrower tube, such as the common 2 mm ID tube, adds so much friction that the AMS cannot push filament to the toolhead reliably.
The tube from the buffer to the toolhead is joined just before the printer with the printed PTFE tube coupler v5:
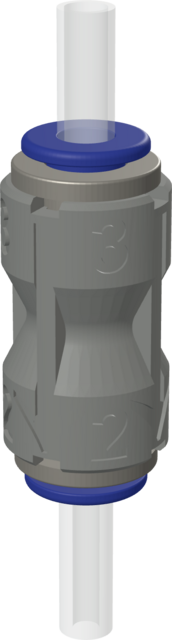
- Push the tube from the buffer into the coupler's 3 end, and the tube to the toolhead into its 2 end. The arrows on its body point the way the filament travels.
- From the coupler to the toolhead, use 3 mm ID tube, or 2 mm ID tube if your extruder's entrance only takes 2 mm ID tube (the Orbiter, for example).
- Do not join 3 mm and 2 mm tube any other way. Where 3 mm tube meets 2 mm tube directly, the 1 mm step catches the filament tip; the coupler's taper guides it past.
- With one AMS, its tube goes straight to the buffer. With two to four, each AMS's tube goes into a printed PTFE splitter, and one tube runs from the splitter to the buffer.
Lay every tube with gentle bends. The filament must slide through the whole path by hand without catching.
¶ Safety
- Do all wiring with the printer switched off and unplugged from the wall, and the bridge's USB unplugged.
- A printer power supply has its mains terminals (L, N and earth) next to its 24 V output terminals. Connect the bridge only to the +V and −V output terminals. If you are not comfortable working in the printer's electronics bay, use a separate 24 V supply.
- USB powers the bridge's own electronics; 24 V powers the AMS through the bridge. A computer or hub can keep USB powered, so the bridge going quiet on the computer does not mean it is off.
- Plug and unplug the 4-pin and 6-pin cables only with the power off.
¶ Ready to continue?
You should have every part on the list, a printer that works on its own, a configuration backup, the stronger spring in the buffer, and a filament path that slides freely. Continue to Print and mount the case, then the Quick start.