¶ Mainboard Firmware Configuration
¶ Introduction
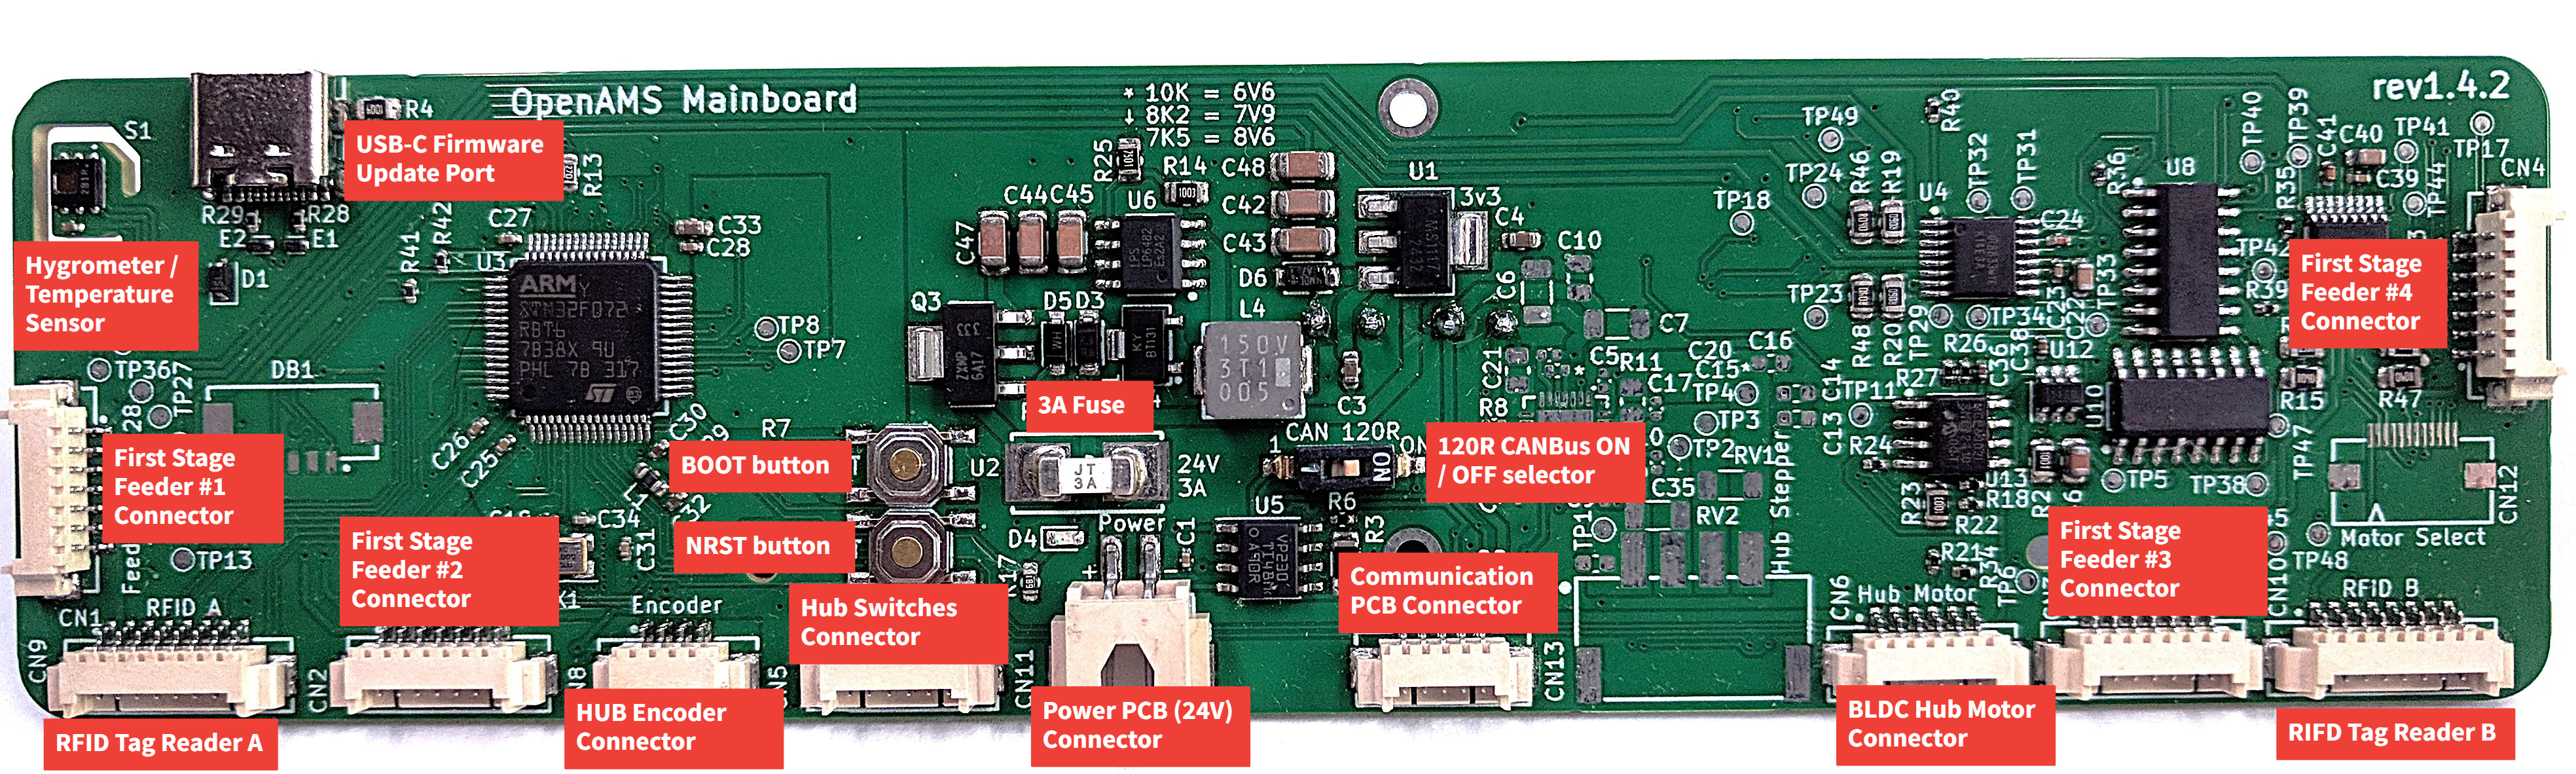
The mainboard is a pure CANBus device. While it has a USB-C connector built-in, the connector's main purpose is to initially load the firmware. Once the firmware has been loaded once, it can easily be updated via CANBus using KanCan. KanCan is a katapult-compatible firmware bootloader used to load the custom firmware onto the board.
Why is a custom firmware required for this board instead of using Klipper firmware? Well, because klipper does not support real-time signals too well. The original AMS contains (along with the OAMS mainboard) the circuitry to control a BLDC motor in real time using the input from the Filament Pressure Sensor (FPS). This real-time control is impossible to achieve via polling without interrupts (Klipper does not support interrupts); writing this firmware, making it compatible with the Klipper protocol, and adding capabilities for real-time control have been the bulk of the development effort, which is no small feat.
The custom firmware hence is a hybrid between klipper control commands, and internal working code. All of the communication implementation with klipper is written in C, and the code is implemented from scratch without any use of the original klipper sources.
¶ The firmware
As of this writing, there are two files needed to make the mainboard operative:
These files are compatible with all of the klipper tools, hence their use is almost identical to other klipper firmware flashing devices.
¶ Flashing the board
First download both files to your PC and use the config interface in mainsail to upload them to the Rapsberry PI.
Connect the OAMS Mainboard to the RaspberryPI, and press and hold the boot button, then press and release the NRST button, and then, finally, release the boot button. This will put the mainboard into DFU mode.
From the Raspberry PI command line:
sudo dfu-util -a 0 -d 0483:df11 -D ~/printer_data/config/kancan_1.4.0.bin -s 0x08000000:mass-erase:force
Once it is done, you can install the mainboard back into the AMS or HydraAMS, and connect the mainboard to the FPS via the Molex 6-pin cable (or to another AMS if using more than one).
Notice that the 120R CANBus selector should be placed on the ON position only for the LAST OAMS in the canbus chain. So if you have two AMS for example, you would connect the FPS to the first AMS, and the first AMS to the second AMS. The first ams would have its 120R CANBus termination selector (DIP switch) on the 1 position (OFF), and the second AMS would have the 120R CANBus termination selector on the ON position. This will ensure proper termination and signal integrity for the communication to all of the AMSs.
Once the AMS is connected and powered on, from the RaspberryPI, you can issue the following to complete the firmware configuration:
cd ~/
git clone https://github.com/Arksine/katapult.git
cd ~/katapult
sudo service klipper stop
source ~/klippy-env/bin/activate
python ~/klipper/scripts/canbus_query.py can0
This will return the uuid we will use to flash the custom firmware to the mainboard
Don't forget to make a note of the Mainboards UUID, you will need it later for setting up oams.cfg in Klipper configuration!
python ~/katapult/scripts/flash_can.py -i can0 -f ~/printer_data/config/oams_2.0.23.bin -u <your_uuid_here>
You can now start klipper:
sudo service klipper start